Sync Data
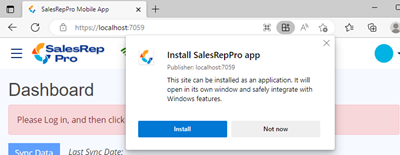
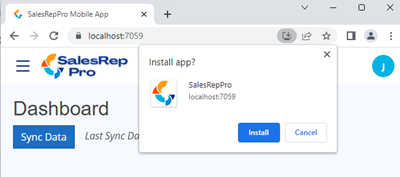
Sync data can only be done while being connected to internet and logged into system.
The first time you log into Sales Rep Pro Mobile, you must perform a data sync, in order to download your customers and items the first time.
The Sync process will to the following:
1) Download current customers and items
2) Upload any orders you have entered, and clear the off line orders once sent to web site.
After you sync, and have uploaded orders to main web site, you can then log in to main web site and Send your orders to the vendors.
Tip
If you know you are going into a store with no internet access, make sure to log in and sync data while online before going to account.
Customer List
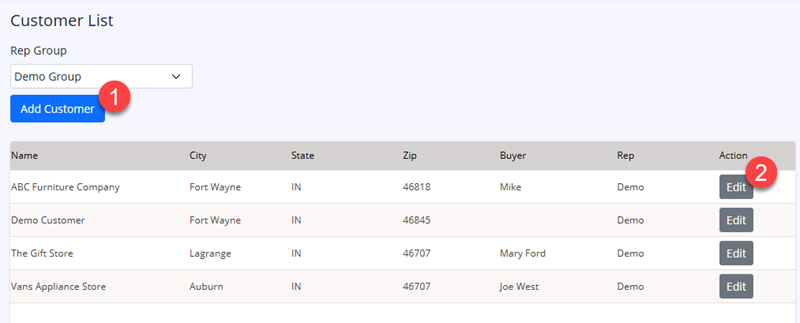
This will show list of your customers.
Page Highlights:
| 1) Add Customer |
Click this button to add a new customer. |
| 2) Edit Button |
Click Edit button next to existing customer, to edit the customer. |
Item List
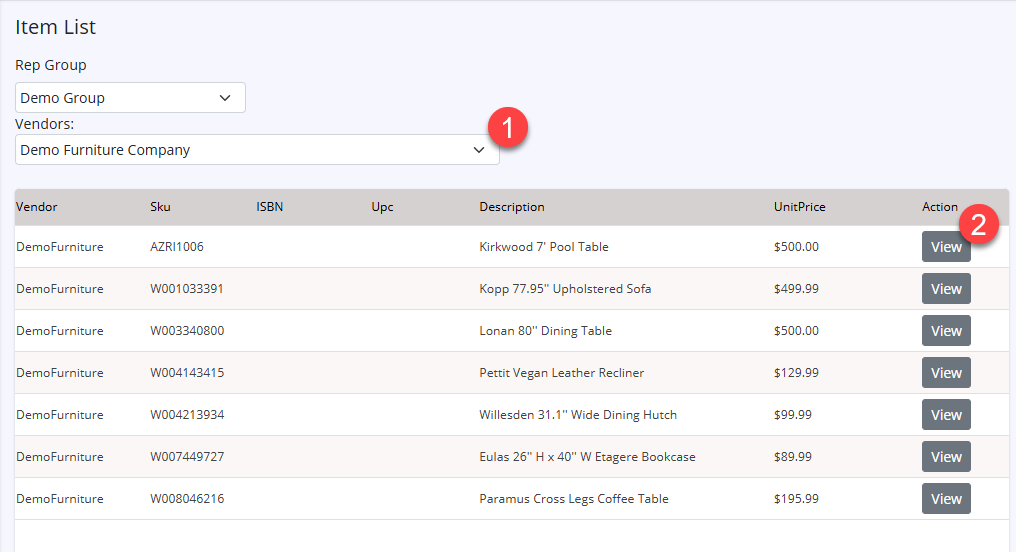
This will show list of your items.
Page Highlights:
| 1) Vendor |
Select vendor from Vendor drop down. |
| 2) View Button |
Click View button next to existing item, to view the item. |
Order List
This will show list of orders entered and not synced yet.
Page Highlights:
| 1) New Order Button |
Click this button to start a new order. |
| 2) Edit Button |
Click Edit button next to existing order, to edit the order. |
| 3) Delete Button |
Click Delete button next to existing order, to delete the order. |
Enter New Order
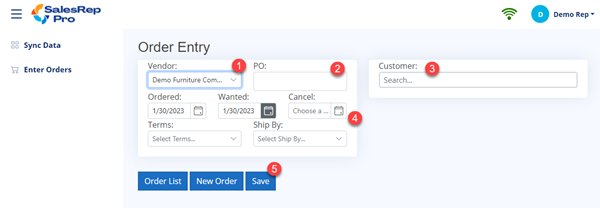
Follow these steps to enter a new order.
Step 1:
Page Highlights:
| 1) Select Vendor |
Select vendor from dropdown list of vendors. |
| 2) Enter PO Number |
Enter PO Nummber for order. |
| 3) Select Customer |
Start typing customer name, list of matching customers will display.
Select your customer from list in dropdown.
The selected customer address and buyer will display. |
| 4) Enter addtional data |
Enter addtional data for order, as needed. |
| 5) Save Order |
Click Save button. |
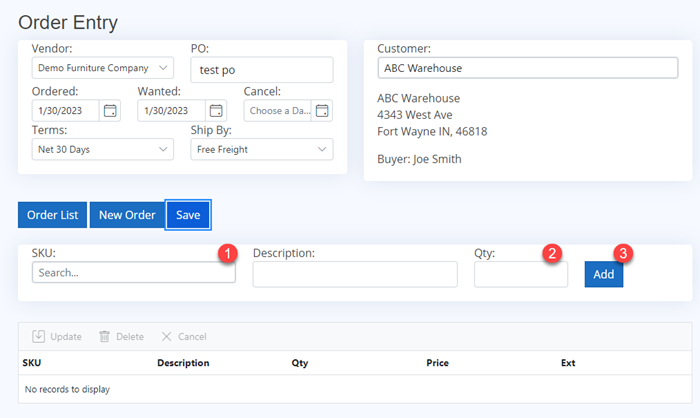
Step 2:
After saving order the first time, the enter items section will display to allow entering items for the order.
Page Highlights:
| 1) Select Item |
Start typing sku, list of matching items will display.
Select your item from list in dropdown.
The selected item description will display. |
| 2) Enter Quantity |
Enter quantity for order. |
| 3) Add Item |
Click Add button to add item to order.
New item will display in list below add item line. |
Click Here for help on editing items in Order Entry
Note
After changing any data in header section for the order, make sure to click the Save button to save the data.
Edit Order
From the Order List click Edit button for the order you wish to edit.
Follow these steps to edit order information.
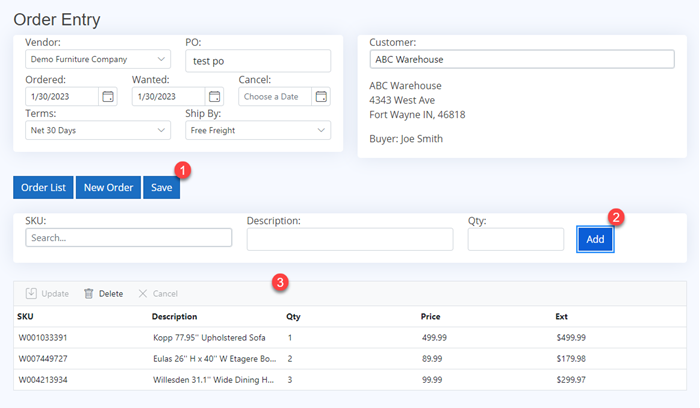
Page Highlights:
| 1) Save Button |
After making any changes to the header data(ie: PO, Terms, etc), click the save button to save the changes. |
| 2) Add Button |
To add items to order, search for SKU, enter qty, then click Add button, to add the item to order item list. |
| 3) Edit/Delete items |
To Edit or delete items from order item list,
Click here for detail help on editing items |
Add Item to Order
Follow these steps to add new item to order.
Page Highlights:
| 1) Select Item |
Start typing sku, list of matching items will display.
Select your item from list in dropdown.
The selected item description will display. |
| 2) Enter Quantity |
Enter quantity for order. |
| 3) Add Item |
Click Add button to add item to order.
New item will display in list below add item line. |
Edit Item
Follow these steps to Edit Item information on order lines.
Page Highlights:
| 1) Edit Qty |
Click into quantity field, and change qty. |
| 2) Edit Price |
Click into price field, and change price. |
| 3) Edit Discount |
Click into discount field and change discount for this item. |
Delete Item
Follow these steps to delete item from order.
Page Highlights:
| 1) Delete Item |
Click the Delete action button next to the item you wish to delete from order. |

